Equipment:
- Camera
- Mac that has iStopMotion installed onto it.
- Materials that your going to be animating, like clay, or for something easier you can use lego.
- A clamp so the camera will stay in the same place. (This is particularly important because if you get it wrong the animation will look scrappy)
- Flat surface to work on.
 Characters:
Depending on what you will be using to animate, like clay or lego, you will need to get numerous characters to make your film. For our theme, we will need a Goody, a Baddy and a Prize or Princess, depending on the exact story.
 Set:
Set:
The setting depends on your personal story, but for an example lets use one of the green lego base pieces. Then you will need to build the setting on top of that that fits your idea.
Camera Shots/Movement:
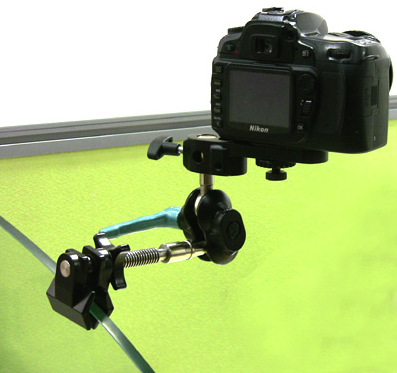 The camera should be positioned so you can see the entire scene, and so that the shot is not affected by shadows or changing light. The clamp will be used to keep the camera in the exact same position, otherwise the scene will change position and it wont look as effective. To shoot the scene you will need to take 3 pictures per frame (so take 3 pictures before you make the new scene).
Editing:
The editing software we will use is iStopMotion, it is an easy way of making stop animation videos. To do it you will link the camera to upload each picture and put them in the right order, making sure that the pictures are in the right order. Then you can press play and the animation should look smooth. If it is jittery and slugish, then you should try increasing the speed of the animation. Or you can do the shots again, and take more pictures per frame, about 5 or 6.
Sound:
Sound is up to you, it depends on your theme and what you want it to sound like. But to import a song you only need to download the track, and drag and drop it onto the sound section at the bottom of the program. Then you can move it from place to place to set it to start in different places.
Exporting:
To export your final animation you need to click on "file", and then save the project, this is just to keep it safe incase anything goes wrong in the exporting process. Then you click on the "file" button, then go down to "export", and then click the "as movie" selection. It will then ask you where to save the exported version of the video to, choose somewhere you will be able to access easily. Now it will start to export, once it is done you will be able to watch your animation.
SO LETS MAKE AN ANIMATION!!!
You're going to want to begin by getting all of the set and characters that you need (shown above) and then you will need to set up your location with the beginning scene. Now you need to adjust the camera angle so that you can see the entire set and the characters you want on screen. Then you can start producing your animation! You will have to take three pictures, and then move your character incredibly slightly, and then take another three pictures
Camera Shots/Movement:
The camera should be positioned so you can see the entire scene, and so that the shot is not affected by shadows or changing light. The clamp will be used to keep the camera in the exact same position, otherwise the scene will change position and it wont look as effective. To shoot the scene you will need to take 3 pictures per frame (so take 3 pictures before you make the new scene).Editing:
The editing software we will use is iStopMotion, it is an easy way of making stop animation videos. To do it you will link the camera to upload each picture and put them in the right order, making sure that the pictures are in the right order. Then you can press play and the animation should look smooth. If it is jittery and slugish, then you should try increasing the speed of the animation. Or you can do the shots again, and take more pictures per frame, about 5 or 6.
Sound:
Sound is up to you, it depends on your theme and what you want it to sound like. But to import a song you only need to download the track, and drag and drop it onto the sound section at the bottom of the program. Then you can move it from place to place to set it to start in different places.
Exporting:
To export your final animation you need to click on "file", and then save the project, this is just to keep it safe incase anything goes wrong in the exporting process. Then you click on the "file" button, then go down to "export", and then click the "as movie" selection. It will then ask you where to save the exported version of the video to, choose somewhere you will be able to access easily. Now it will start to export, once it is done you will be able to watch your animation.
SO LETS MAKE AN ANIMATION!!!
You're going to want to begin by getting all of the set and characters that you need (shown above) and then you will need to set up your location with the beginning scene. Now you need to adjust the camera angle so that you can see the entire set and the characters you want on screen. Then you can start producing your animation! You will have to take three pictures, and then move your character incredibly slightly, and then take another three pictures
Pass - for merit.
ReplyDeleteExplain how to make a stop motion animation